Sunday, August 29, 2010

Italian Prune Plums


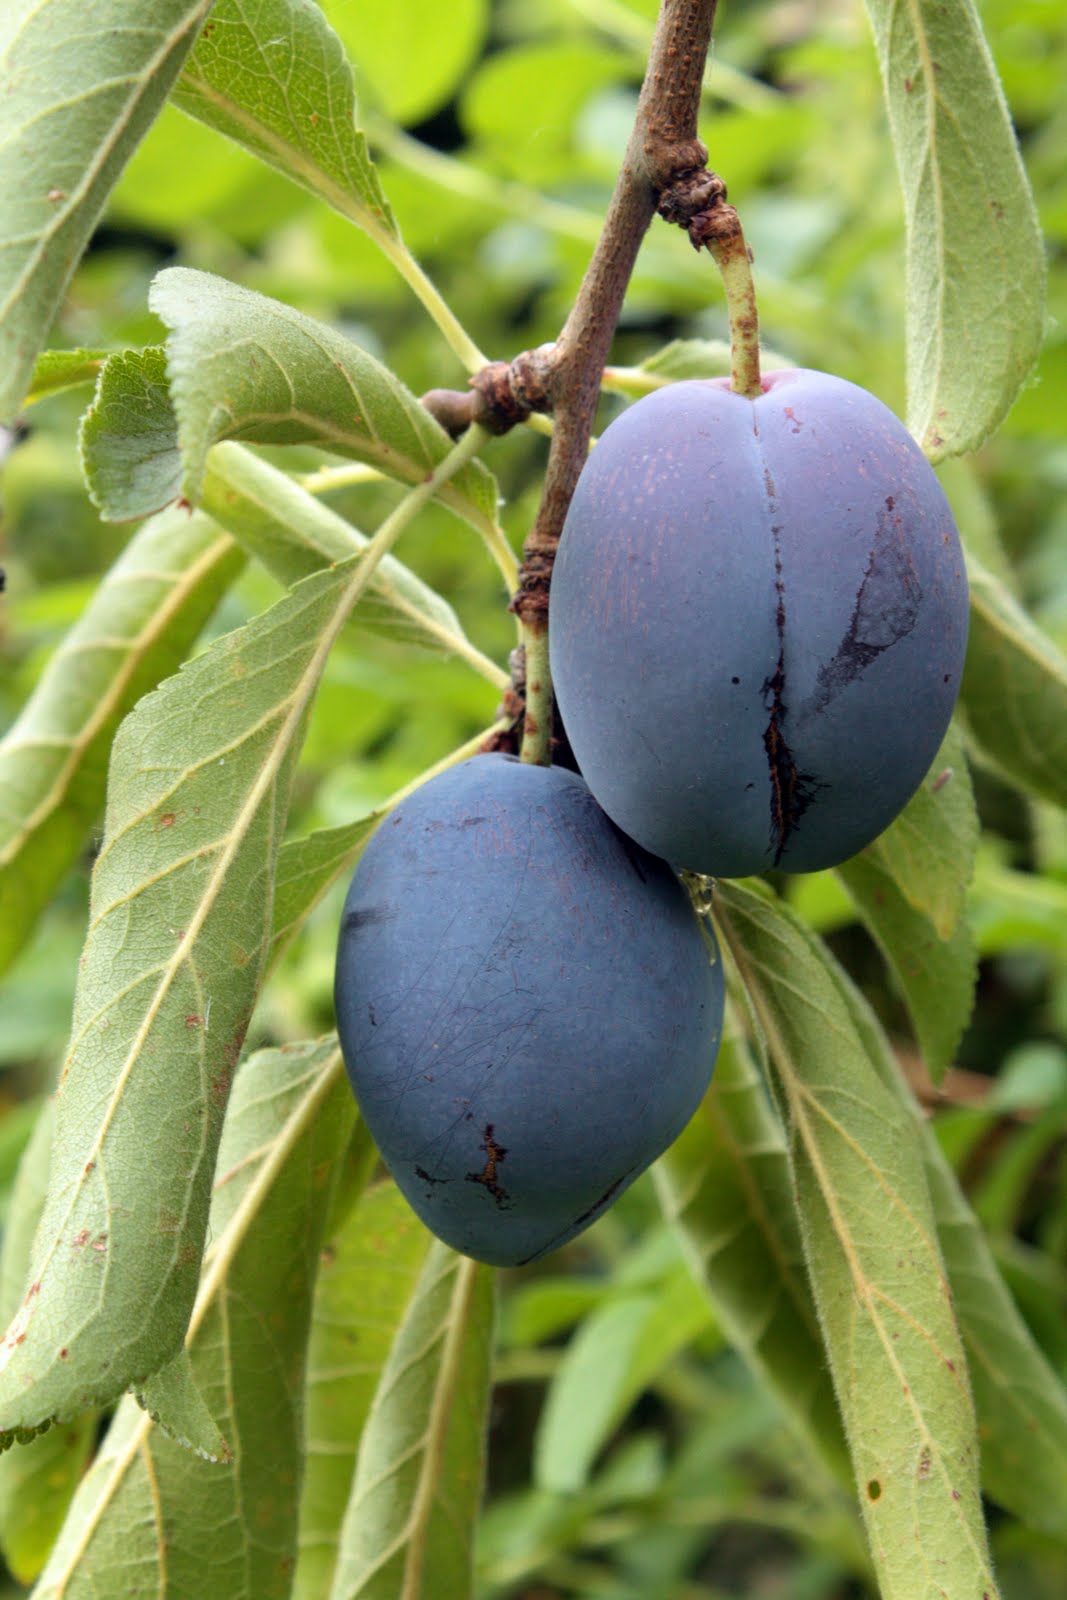
One of the delights of summer. Italian prune plums are, I dare say, superior to all other plums. The small egg-shaped fruit has blue to purple bloom-covered skin and amber flesh that separates easily from the pit. Compared to other plums, the flesh is sweeter and less juicy, and the skin isn't nearly as sour. They're great for eating fresh and also perfect for baking. And fear not—fresh Italian prune plums bear no resemblance to dried.

It seemed natural to pair our Italian plums, from the little tree in our garden, with some fruity olive oil we brought back from Italy.


Plum Honey-Olive Oil Cake
Printable Recipe

Unsalted butter, for greasing the pan
1 ¾ cups all-purpose flour
¼ teaspoon baking powder
¼ teaspoon baking soda
¼ teaspoon fine sea salt
2 large eggs
½ cup plus 2 tablespoons sugar
½ cup honey, preferably orange blossom honey
¾ cup extra virgin olive oil
¼ teaspoon vanilla extract
2/3 cup milk
8 Italian prune plums, halved and pitted

Preheat the oven to 350ºF. Butter a 9-inch round cake pan, line the bottom of the pan with parchment paper, and butter the parchment. Sift together the flour, baking powder, baking soda, and salt.

In a large bowl, whisk together the eggs and sugar for 2 to 3 minutes, or until light and fluffy. Whisk in the honey until thoroughly combined and then whisk in the olive oil and vanilla extract until thoroughly combined. Add 1/3 of the flour mixture, then ½ of the milk, then 1/3 of the flour mixture, then the remaining ½ of the milk, and then the remaining 1/3 of the flour mixture, whisking for only a few seconds after each addition until just combined. Do not overmix. Transfer to the cake pan and arrange the plums cut side down over the batter. Bake for about 1 hour and 10 minutes, or until the edges of the cake start to shrink away from the pan and a toothpick inserted into the center comes out clean. Let the cake cool in the pan for about 10 minutes. Run a paring knife around the inside of the cake pan, invert onto a cooling rack, and finish cooling completely. Cut into portions and serve.

Makes 1 9-inch cake, serving 8. The honey in the batter will cause the cake to brown quickly. The batter is relatively thin, and the plums will fall to the bottom of the cake as it bakes, so the cake is most attractive served upside down. This cake is effortless to whip up and yet loaded with flavor. It stays moist longer than most and may be even better the day after it's baked.

Monday, August 23, 2010

Eating Corn on the Cob


Anyone else eat corn on the cob one row of kernels at a time? Anyone? Please don't judge me because I do it that way. I can't tell you how much grief I get for it. My husband thinks it's freakish and wrong and says I look like a typewriter eating corn. He makes fun of me each and every single time corn on the cob is on the menu—it never gets old for him. The habit started in seventh grade, when I first got braces. But now I do it because I have jaw problems, and it makes my jaw muscles less sore to nibble off one row of kernels than to open wide and go at it like normal. Besides, my method is so much more neat and orderly, and I just don't like the feeling of having bits of corn stuck between my teeth. I can't be the only one with this particular quirk, can I?


Anyway, usually I avoid the issue altogether…


Corn & Poblano Chowder
Printable Recipe

2 tablespoons (¼ stick) unsalted butter
1 small yellow onion, diced
1 stalk celery, diced
2 cloves garlic, minced
1 ½ quarts water
1 bay leaf
1 small sprig thyme
Kernels from 6 ears corn
¼ cup heavy cream
3 roasted poblanos, julienned
Kosher salt
Freshly ground black pepper

Heat a large, heavy pot over medium heat until hot but not smoking. Add the butter, onion, and celery and sauté for 4 to 5 minutes, or until soft. Add the garlic and sauté for another 30 seconds, or until fragrant. Add the water, bay leaf, thyme, and half of the corn. Bring to a boil and simmer, stirring occasionally, for 25 to 30 minutes, or until the flavors come together. Discard the bay leaf and thyme sprig, remove from the heat, and puree with an immersion blender until smooth. Strain through a fine mesh sieve. Return to the heat and add the cream, poblanos, and remaining half of the corn. Bring to a boil and simmer, stirring occasionally, for another 20 to 25 minutes, or until the corn kernels are tender. Season to taste with salt and pepper. Ladle into bowls and serve immediately.

Serves 4 to 6 as a first course. An absolute must for summertime, when corn is at its peak. If you don’t have an immersion blender, you can use a regular blender but remember: never fill a blender more than half way with hot liquid. This means you will need to blend the soup in batches and reheat it before serving. This is a vegetarian soup.

Tuesday, August 17, 2010

Picky Eating as a Medical Condition?

If a grown adult refuses to eat anything but grilled cheese sandwiches, fries, and waffles, it may now be considered a legitimate medical condition. Well, call me ignorant because I'd always thought picky eating was bad habit or hang up. Or downright childish behavior.

But apparently it's a disease. So be worried…Your kid is sick if he or she avoids all green foods or consumes only foods that are orange. You should seek medical help if broccoli disgusts you. I'm calling the advice nurse and getting a prescription because I dislike fennel and anything that tastes like fennel. I'm really concerned for my father, who feels violated if there's salad (or any vegetable, for that matter) on his plate. And my sister-in-law, who is repulsed by tomatoes, caviar, and anything else that pops because it makes her think of eyes—I'm wondering if a trip to the emergency room is in order?

I will admit that picky eating could lead to a variety of medical problems that a varied, balanced diet would avoid. But seriously folks. I can't tell you how many times I've witnessed first hand a child reach to taste something new, only to have the parent say, "Little Johnny, you wouldn't like that." Is it any wonder little Johnny grows up to be afraid of trying new foods? Even worse, it's considered perfectly normal when adults prepare one meal for themselves and a completely different meal for the kids. I don't know whether they think they're doing themselves or their kids a favor, or if it's a lack of sense or ability to discipline. My parents taught me that our house wasn't a restaurant and that if I was hungry, I would eat whatever food was put in front of me. I didn't get dessert until I finished my dinner either. Now I eat almost everything, and I'm even working on my fennel-and-anything-that-tastes-like-fennel-hate. And another thing, a kid may grow up to be a picky eater simply because his or her mom was a bad cook. The fact that my husband hated steak most of his life can be directly attributed to a childhood of eating well-done sirloin. The fact is, we are a nation of picky eaters because we are raised to be, not because it's some sort of disorder.

…On the other hand, the next time my husband tries to pick out the almonds from a cake I bake, I'm sending him to have his head examined.

Anyway, here's a recipe for a vegetable that's sure to make picky eaters head for the hills…


Fried Okra
Printable Recipe

¾ cup fine cornmeal
1/3 cup all-purpose flour
1 tablespoon granulated garlic
¼ teaspoon cayenne pepper
Kosher salt
Freshly ground black pepper
Canola oil, for frying
¾ pound fresh okra, cut into ¾-inch pieces
1/3 cup buttermilk

Whisk together the cornmeal, flour, granulated garlic, cayenne, and a generous pinch of salt and pepper in a large, shallow dish. Add enough oil to a large, heavy frying pan to come to a depth of ¾ inch. Heat over medium-high heat until a pinch of the cornmeal mixture sizzles immediately when added. Meanwhile, add the okra to the buttermilk, and stir to coat. Transfer the okra to the cornmeal mixture and toss to coat, separating any pieces that stick together. Shaking off any excess cornmeal mixture, add about half of the okra to the oil and fry, stirring occasionally, for 3 to 4 minutes, or until golden brown. Using a skimmer, remove to a paper towel-lined plate and immediately season to taste with salt. Fry the remaining okra in the same manner. Transfer to a bowl and serve immediately.

Serves 4 to 6. Fried okra is extremely popular in the South, and for good reason—it’s downright addictive! Summer is okra season. Select small okra pods, no larger than your pinkie finger, since large pods can be tough and stringy. Although fresh okra is best, you can substitute the fresh okra with a 16-ounce bag of frozen whole okra with good results. Thaw the frozen okra pods about half way for this recipe. Serve with ketchup or ranch dressing for dipping.

Wednesday, August 11, 2010

Cherry Time!


For those of you who wanted to take your Rx but didn't have a chance to get it filled…


Here, take one of my doses.


But be careful—it's very addictive.


Side effects may include drowsiness, sweating, red discoloration of the tongue, a feeling of well-being…


And Cherry-Almond Coffee Cake.


Cherry-Almond Coffee Cake
Printable Recipe

7 ounces (1 ¾ sticks) unsalted butter, at room temperature, plus more for greasing the pan
11 ¼ ounces cake flour
½ teaspoon baking powder
½ teaspoon baking soda
¼ teaspoon fine sea salt
7 ½ ounces light brown sugar
1 ½ teaspoons cinnamon
2 ounces sliced almonds
6 ounces sugar
3 large eggs, at room temperature
1 teaspoon vanilla extract
¼ teaspoon almond extract
8 ounces sour cream, at room temperature
¾ pound cherries, pitted

Preheat the oven to 350ºF. Butter a 9×3-inch round cheesecake pan, line the bottom of the pan with parchment paper, and butter the parchment. Sift together 9 ounces of the flour and the baking powder, baking soda, and salt.

Whisk together 3 ½ ounces of the brown sugar, the remaining 2 ¼ ounces flour, and the cinnamon in a medium bowl. Add 2 ounces of the butter and, using your fingertips, rub in the butter until the mixture holds together in clumps. Toss in the almonds.

In a mixer fitted with a paddle attachment, beat together the remaining 5 ounces butter, sugar, and remaining 4 ounces brown sugar on high for 3 to 4 minutes, or until light and fluffy. Beat in the eggs one at a time until thoroughly combined and then beat in the vanilla and almond extract. Add 1/3 of the flour mixture, then ½ of the sour cream, then 1/3 of the flour mixture, then the remaining ½ of the sour cream, and then the remaining 1/3 of the flour mixture, mixing on low for only a few seconds after each addition until just combined, and stopping the mixer once or twice to scrape down the sides of the bowl. Do not overmix. Transfer to the cake pan and spread evenly. Spread the cherries evenly over the batter and then spread the almond mixture evenly over the cherry layer. Bake for about 1 hour and 15 minutes, or until the edges of the cake start to shrink away from the pan and a toothpick inserted into the center comes out clean. Let the cake cool in the pan for about 10 minutes. Transfer to a cooling rack and finish cooling completely. Cut into portions and serve.

Makes 1 9-inch cake, serving 8. Use a springform pan if you don't have a cheesecake pan.

Thursday, August 5, 2010

Prescription for a Perfect Summer Day

Sleep in late. A visit to the farm is the thing to do, just don't forget the sunscreen. Stroll through the rows of blueberry bushes, sampling as you go.


Perhaps have a leisurely picnic lunch.


Watch the chickens scratch.


If you approach slowly, they may not scatter.


Relish the sweetness of the berries, warmed by the sun. For every raspberry that goes into your basket, one goes into your mouth. Find the biggest tree and lounge in the shade.


Follow the snake of trained blackberry vines.


You will be rewarded with the first ripe blackberry.


Then cool down with homemade frozen yogurt.


Hurray for summer.

Nectarine-Raspberry Swirl Frozen Yogurt
Printable Recipe

3 nectarines, pitted and quartered
¼ cup plus 1 tablespoon sugar
2 cups plain yogurt
4 ounces raspberries
1 ½ teaspoons Chambord
½ teaspoon freshly squeezed lemon juice

Combine the nectarines, ¼ cup of the sugar, and 2 tablespoons water in a small pot. Bring to a boil and simmer for 2 to 3 minutes, or until tender. Puree in a food mill using a fine disc. Let cool to room temperature and stir in the yogurt. Chill over an ice bath until ice-cold.

Meanwhile, puree the raspberries in a food mill using the finest disc. If the puree has seeds, strain it through a fine mesh sieve to remove them. Stir in the Chambord, lemon juice, and remaining 1 tablespoon of sugar. Chill over an ice bath until ice-cold.

Transfer the nectarine mixture to an ice cream maker and churn until frozen. With the motor running, add the raspberry mixture in a thin stream. Serve immediately or transfer to a container and freeze.

Makes 1 generous quart. A refreshing and fairly guilt-free treat. Peaches may be substituted for the nectarines, and blackberries may be substituted for the raspberries. If your ice cream maker doesn't have an opening for adding mix-ins, transfer 1/3 of the nectarine frozen yogurt to a container, drizzle with ½ of the raspberry swirl mixture, and repeat layering with the remaining frozen yogurt and raspberry swirl. For the best texture, enjoy as soon as possible after churning. This frozen yogurt will harden in the freezer; soften it by tempering it in the refrigerator for about 20 minutes before scooping.

Monday, August 2, 2010

When Simplicity Is Best


One last asparagus dish before asparagus season is a thing of the past. This vegetable is a favorite in our house, and we seem to prefer it simply prepared. Fresh asparagus tossed with olive oil and a sprinkling of salt and pepper and grilled until the tips become crisp. Juicy spears blanched until tender-crisp and tossed with butter. A perfect vegetable doesn't need much help to shine.

On another note, if you haven't already heard, I've entered Anthony Bourdain's Medium Raw Challenge. Please check out my meditation on the meaning of cooking well and then vote for me to win!


If you're crazy about my essay, you can even vote daily. The winning essay will be published in the paperback edition of Medium Raw. To those of you who've already been voting, I owe you a big thank you with sugar on top!

One more thing, registration for fall Clark College cooking classes is now open. I'll be teaching Sensational Salads for Fall, Seared to Perfection, Soup Series: Chinese Favorites, and Soup Series: Deli Favorites. If you're in the Vancouver, Washington area, please join me. Classes are fun, educational, and you get to eat some pretty fantastic grub! And don't forget, you can always find my current class listings in the Lucy's Upcoming Cooking Classes sidebar on the right.

Asparagus with Parmegiano Butter*
Printable Recipe

2 tablespoons (¼ stick) salted butter, softened
2 tablespoons grated Parmegiano-Reggiano
1 clove garlic, grated
Freshly ground black pepper
1 pound asparagus, trimmed of woody ends
Kosher salt

Blend together the butter, Parmegiano, and garlic in a small bowl. Season to taste with pepper.

Blanch the asparagus in a large pot of boiling, salted water for 3 to 4 minutes, or until tender (but do not shock). Using tongs, transfer the asparagus to a paper towel-lined plate and drain for about a minute. Toss together the asparagus and Parmegiano butter in a large bowl. Transfer to a serving platter and serve immediately.

Serves 2 to 4. The Parmegiano must be finely grated, preferably with a microplane, so that it adheres nicely to the asparagus. Top each portion with a sunny-side-up egg for a wonderful brunch.


*For information on making and using compound butters, including a variety of compound butter recipes, and everything you ever wanted to know about searing, plus dozens of fabulous searing recipes, look for my book Seared to Perfection in stores in October.
Blog Widget by LinkWithin