Showing posts with label Pasta recipes. Show all posts

Monday, May 12, 2014

Dining Chair Travel and Macaroni Made by Hand

Who doesn’t love Italian food? I certainly always have, but I can’t say I had a real appreciation of the cuisine until I actually travelled to Italy. Experiencing balsamic, parm, and prosciutto at the source was amazing. But it was eating perfectly al dente, perfectly sauced spaghetti in Italy that really blew my mind. The way the Italians can transform something so simple as semolina and water into a transcendent meal is nothing short of alchemy.

I’ve been dying to see other parts of Italy ever since that trip. Until I can go again, a bit of dining chair travel will have to suffice. So I make pasta. A good plate of pasta will transport me, if just for a meal.


This labor intensive pasta, which comes from southern Italy if I’m not mistaken, seems to have countless names, including maccheroni al ferro, maccheroni al ferretto, and maccheroni inferrettati. Google Translate would have you believe that the meaning is “macaroni with underwire” *snicker*, but as far as I can tell it translates to something more along the lines of “macaroni with the iron”, referring to the traditional tool called a fusilli iron used to shape the tubes of pasta.

Fresh Macaroni “with the Iron”
Printable Recipe

16 ounces semolina
6 ¾ ounces warm water

Combine the semolina and water in a large bowl and mix until a rough dough forms. The dough will seem very dry at this point, but resist the temptation to add more water. Transfer to a work surface and knead for about 10 minutes, or until smooth and elastic. Wrap in plastic wrap and let rest for about half an hour.

Cut the dough into eighths. Keeping the remaining dough covered as you work, roll 1 portion of dough into a 3/8-inch thick rope. If the dough springs back as you roll it, cover it with plastic wrap and let it relax for a few minutes before continuing. Using a bench knife, cut the rope into 2-inch pieces.


Press a fusilli iron lengthwise into a piece of the dough.


Roll back and forth, applying light pressure.


The dough should wrap itself around the iron and form a 4 to 5-inch long tube.


Gently slide the macaroni off the iron.


If it’s stuck, give the iron a slight twist while easing off the macaroni. Make more macaroni with the remaining dough in the same manner. As you work, arrange the macaroni in a single layer on lightly floured parchment-lined baking trays. Let dry for a few hours.

Makes about 1 ¼ pounds, enough for 4 to 6 main-course servings. This recipe yields a relatively dry dough. Still, the trickiest part is keeping the macaroni from sticking to the fusilli iron, and you might have to experiment with the amount of pressure you apply when rolling and elongating it. If a macaroni gets stuck and you smush it removing it from the iron, never fear: simply ball it up and try again. By the way, if you don’t own a fusilli iron, a bamboo skewer will work just as well if not even better, as dough sticks less to wood than to smooth metal. Knitting needles are often used as well. Cook the macaroni as you would any other pasta, in a large pot of boiling, salted water for 6 to 8 minutes, or until al dente. It’s pictured here with Angry Tomato Sauce made with bacon instead of pancetta.

Friday, March 21, 2014

Seafood, Cheese, and The Rules

The Rules say using cheese in seafood dishes is forbidden. The Rules dictate that the flavor of cheese is too bold and overwhelming for mild, delicate fish and shellfish. Cows and fish are separated by geography and therefore must remain separate on the plate, The Rules will have you believe.

If The Rules were strictly enforced, bagels with cream cheese and lox, Smoked Salmon Spread, crab dip, pizza with anchovies, tuna melts, tuna noodle casserole, coquilles St. Jacques, and even Caesar Salad would be prohibited. Who among us would want to live in a world without those?

The Rules against combining seafood come to us from the Italian culinary tradition, and you know I have great respect for Italian culinary tradition. I’m not saying that so many chefs, home cooks, and nonnas are wrong. But I am saying The Rules are meant to be broken. Cook what you like! Eat what you like, people, no matter what anyone else has to say about it!

So go ahead and fold crabmeat into your fettuccini with Alfredo Sauce and sprinkle grated parm onto your Spaghetti with Seafood Marinara and linguini with clams if you want to! Just be prepared for a few sideways glances from orthodox Italian cooks.

Before I get to a recipe that breaks all The Rules, I have a quick announcement: Leite’s Culinaria is giving away a copy of Flavored Butters. Enter for your chance to win.


Baked Paccheri with Crab and Ricotta
Printable Recipe

2 ounces (½ stick) unsalted butter, diced, plus more for greasing the baking dishes
2 ounces all-purpose flour
1 quart milk
½ small yellow onion
1 bay leaf
1 clove
Generous pinch freshly grated nutmeg
Kosher salt
Freshly ground black pepper
500 grams (1.1 pounds) paccheri
2 large eggs
1 clove garlic, grated
1 ¾ pounds ricotta
5 ½ ounces grated Parmegiano-Reggiano
1 pound lump Dungeness crabmeat, picked over

Heat the butter in a small, heavy saucepan over medium heat until it melts, bubbles, and the foam subsides. Add the flour and cook, whisking constantly, for 2 to 3 minutes, or until it begins to smell toasty. Whisk in the milk. Bring to a boil, whisking constantly, add the onion, bay leaf, clove, and nutmeg, and simmer for 20 to 22 minutes, or until thick. Remove from the heat, strain through a fine mesh sieve, and season to taste with salt and pepper. Let cool.

Cook the paccheri in a large pot of boiling, salted water according to the package directions. When the paccheri begins to soften, using a wire skimmer, transfer it from the pot to a large bowl of ice-cold water to stop the cooking process, and then drain it thoroughly. Layer the paccheri between clean kitchen towels to dry.

Preheat the oven to 400˚F. Butter 8 individual baking dishes. Whisk together the eggs and garlic in a large bowl. Stir in the ricotta, 1 ½ ounces of the Parmegiano, and the crabmeat and season to taste with salt and pepper. Transfer to a pastry bag fitted with a large plain tip and pipe into the paccheri, filling each one loosely. Divide the filled paccheri among the baking dishes, arranging them in a single layer. Divide the white sauce among the baking dishes and spread evenly. Sprinkle evenly with the remaining 4 ounces of Parmegiano. Arrange the baking dishes on a baking tray and bake for 20 to 25 minutes, or until the sauce is bubbling around the edges.

Serves 8. The paccheri should be boiled until it begins to soften but not until it is al dente. Undercooking the pasta in this way ensures that it doesn't become too mushy once it's baked. Feel free to substitute manicotti or jumbo shells for the paccheri. This rich dish is best accompanied by a salad with a sharp vinaigrette.

Monday, March 3, 2014

Butter Tasting at West Elm and a Recipe Using Shrimp Butter

Have you tried any of the recipes in Flavored Butters yet? Would you like some new ideas for ways to use them? Well, have I got an awesome idea for you right now! Use the Shrimp Butter from the book to make this Spaghetti with Seafood Marinara.


If that sounds good, I’ll have a lot more ideas for you at my upcoming Flavored Butters event at the Portland West Elm on Saturday, March 15 from 12:30PM to 3PM. Come join me for some butter banter and plenty of delicious samples of recipes from the book.


Chalkboard photo courtesy of Jae Obiniana at West Elm.

I just realized—see that platter and those serving utensils with the pasta? They’re from West Elm! And believe it or not, I didn’t even plan it that way! Goes to show how much I love West Elm style. So it’s a real honor to be invited to do a book event there.

While I’m on the subject of honors, I have to take a moment to say I am so honored that Amherst Bulletin included Flavored Butters in this list of cookbooks that “feed the imagination”. Thank you, Amherst Bulletin!

Now, back to that Spaghetti with Seafood Marinara. Sure you could just throw some seafood into some red sauce and call it good, but add a little Shrimp Butter and a good dish is elevated to an amazing dish, to a dish worthy of the best Italian restaurant. The Shrimp Butter boosts the seafood flavor off the charts. So save up some shrimp shells and give it a try!

Spaghetti with Seafood Marinara
Printable Recipe

3 cups Basic Tomato Sauce
1 pound spaghetti
Kosher salt
1/3 pound jumbo shrimp (16/20 count), peeled and deveined
¼ pound bay scallops
¼ pound squid rings
Freshly ground black pepper
¼ cup plus 2 tablespoons Shrimp Butter
4 cloves garlic, minced
½ pound small clams
¼ pound mussels
Generous pinch red chile flakes
1/8 pound lump Dungeness crabmeat, picked over
2 tablespoons minced Italian parsley
Grated Parmegiano-Reggiano, for serving, optional

Bring the tomato sauce to a simmer and keep warm. Cook the spaghetti in a large pot of boiling, salted water according to the package directions.

Meanwhile, season the shrimp, scallops, and squid with salt and pepper. Heat a large, heavy pot over medium-high heat until hot but not smoking. Add the butter and let melt. Add the shrimp and a quarter of the garlic and sauté for about 1 minute, or until almost cooked through. Remove the shrimp to a plate. Add the scallops and another quarter of the garlic to the pot and sauté for about 1 minute, or until almost cooked through. Remove the scallops to the plate with the shrimp. Add the squid and another quarter of the garlic to the pot and sauté for about 30 seconds, or until almost cooked through. Remove the squid to the plate with the shrimp and scallops. Add the clams and mussels and the remaining quarter of the garlic to the pot and sauté for about 1 minute. Add the tomato sauce and red chile flakes and simmer for 1 to 2 minutes, or until the clams and mussels begin to open. Return the shrimp, scallops, and squid to the pot and simmer for 2 to 3 minutes, or until the seafood is just cooked through. Remove from the heat, stir in the crabmeat and parsley, and season to taste with salt and pepper. Drain the pasta when it is al dente. Add the pasta to the sauce and toss to coat. Arrange on individual plates, top with plenty of Parmegiano, if desired, and serve immediately.

Makes 5 to 6 servings. Seafood must be impeccably fresh, especially mussels and clams. Purchase live mussels and clams the day you intend to cook them. When you bring them home, the shells may be open, especially if they’ve been stored on ice. Tap them gently and see that they close; discard any that do not close. To prepare them, scrub with a stiff-bristled brush and de-beard the mussels. Discard any mussels or clams that do not open once cooked. If desired, add a couple of tablespoons of white wine to the pot along with the clams and mussels.

Friday, February 21, 2014

More Adventures in Extruded Pasta

If you’ve read this blog for any length of time, you’re probably aware that I’m obsessed with pasta, especially homemade extruded pasta. I searched for an affordable pasta extruder with bronze dies for many years. It took a trip to Bologna for me to find my prize, a manual model known in Italian as a torchietto per pasta.

Traveling half way around the world proved to be but a small fraction of the effort and determination required to produce my homemade bronze-extruded pasta. I can’t tell you how many times I tried my torchietto just to give up and switch back to my KitchenAid extruder, but eventually I persevered.


First there was the issue of where to mount the torchietto. Even as it gouges whatever surface it’s attached to, the clamp fails to hold the torchietto securely in place. The clamp ate through several dishcloths and even a silicone hot pad, which I used in a futile attempt to protect my marble work surface and to keep the torchietto from sliding around as my husband tried to crank the handle. Thin, cheap, and sturdy enough to withstand the jaws of the hungry little clamp, a small piece of a cedar grilling plank inserted between it and the bottom of the marble offered a workable solution.

Then there was the Goldilocks-like nature of the torchietto. If the dough is too soft and sticky, it won’t make its way down the hopper. If the dough is too dry, it’s nearly impossible to turn the crank. But while Goldilocks needed three tries, I lost count of how many it took me before I figured out the texture of dough that’s just right. And it’s pretty darned firm.

Finally, there was the feat of Herculean strength required. It’s an understatement to say that cranking the handle of the still-shimmying torchietto to force that firm dough into the form of pasta is hard work. One revolution of the crank produces only a couple of millimeters of pasta, so it takes a long, long time to make a single serving. Sustained brute force is required. I would usually enlist the help of my muscle-bound husband for attempts to make the torchietto work, but the day all the pieces came together I was on my own. It wasn’t long before my heart rate became elevated and I began to glisten. An hour into my two-portion batch of pasta workout, my arm, shoulder, and every other part of my upper body were on fire and crying for mercy, and I was nowhere near done.

Finally, much problem solving, physical exertion, and ibuprofen later…Success!


(I wonder if I expended more calories making this spaghetti or if I ingested more calories when I devoured it with a delicious gravy of finely diced pork butt braised in Basic Tomato Sauce?)

So was the torchietto with the bronze dies worth all the effort? Hell yeah! The texture and flavor of the pasta is superior and the shaggy-looking rough surface holds sauce beautifully. And then there’s something to be said for achieving a difficult goal and for the satisfaction of making beautiful pasta with nothing but water, flour, and elbow grease.

Before I get to the recipe, I’d like to take a moment to thank the Cooking Club of America for including my Chocolate Fondue for Two with Strawberries recipe in their newsletter.

Homemade Extruded Pasta
Printable Recipe

5 ounces semolina, plus more for dusting
5 ounces all-purpose flour
4 to 4 ½ ounces water

Combine the semolina and flour in a mixer fitted with a paddle attachment and mix until blended. With the motor running on low, slowly trickle in the water. Continue to mix on low until the dough resembles coarse crumbs. The dough will seem very dry at this point, but resist the temptation to add more liquid. A dry dough—so dry that it won’t even come together into a single mass—will be easy to feed into the extruder, and the freshly extruded pasta will be less likely to stick together. Cover with plastic wrap and let rest for about 15 minutes.

Pass the dough through a pasta extruder fitted with the desired die, adding only a small amount of dough at a time and moving it around in the hopper frequently to help it fall into the machine without binding. Cut the pasta to the desired length as it emerges from the die.

Makes 2 generous servings. Use the smaller quantity of water for a manual torchietto, the larger quantity for a KitchenAid extruder. Arrange short cut pasta in a single layer and dust long cut pasta generously with semolina and form loose nests on pasta screens, lightly floured parchment-lined baking trays, or towel-lined baking trays. Alternatively, hang long cut pasta on a pasta rack. Pasta may be left at room temperature like this to dry for up to several hours or cooked immediately. Cook in a large pot of boiling, salted water until al dente. Cooking time is usually only 2 to 5 minutes, depending on how wet the dough was and how long the pasta has been left to dry. To clean the extruder, disassemble, remove any large gobs of dough, and let the rest dry overnight before attempting to clean the parts. The dough will flick right off once it’s completely dry.

Previously: Adventures in Extruded Pasta.

Friday, January 24, 2014

Mixed Pasta

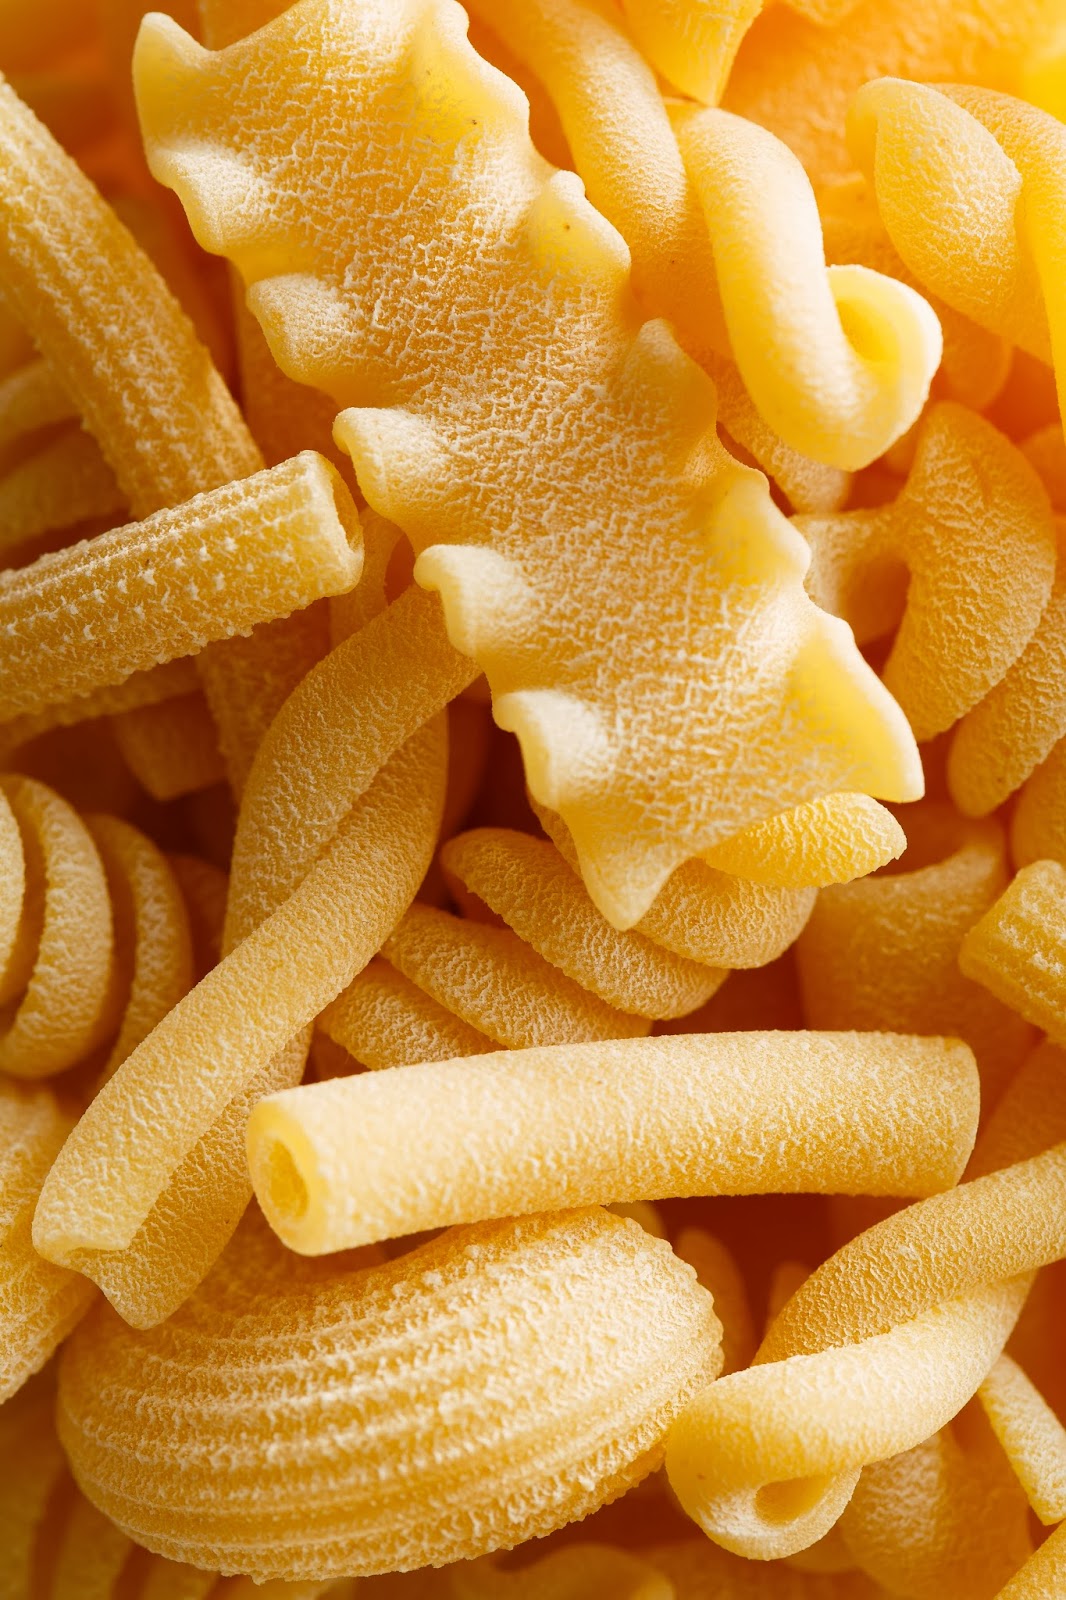
Though they’re rarely available here, packages of mixed pasta shapes are a common sight in gourmet shops in Italy. I first encountered them on a trip to Venice, and I must admit I initially eyed them with suspicion. In my head I could imagine odds and ends being swept off the pasta factory floor and put in packages to sell to tourists. But then as I saw more and more of these blends, I realized that they were almost always the product of artisan pasta makers. Obviously this meant they couldn’t be that bad. My curiosity was piqued.


It turns out these pasta shape mixes are meant to replicate those created by frugal Italian nonnas, who would artfully combine the small quantities of different shapes of pasta they had left in the bottom of various packages after cooking a week’s worth of meals. Pasta shapes were blended with great care and consideration for pairing with the selected condiment or sauce.


As pasta maker and owner of Pastificio dei Campi Giuseppe Di Martino says, the origin of the mixed pasta “follows the tradition of making great food of small things or the wisdom of not producing unnecessary waste.” The pasta pictured here, by the way, is Pastificio Dei Campi’s exquisite Mischiato Potente di Gragnano.


Of course, learning this bit of cultural history made my reservations about the packages of mixed pasta shapes disappear. I took a closer look and realized how beautiful the mixes are and how much fun they would be to eat.


Mixed Pasta with Tomato Sauce and Ricotta
Printable Recipe

500 grams (1.1 pounds) mixed short pasta
Kosher salt
2 cups Basic Tomato Sauce
8 ounces ricotta, at room temperature
1 tablespoon extra virgin olive oil
Grated Parmegiano-Reggiano, for serving

Cook the pasta in a large pot of boiling, salted water according to the package directions. Meanwhile, bring the tomato sauce to a simmer in a large, heavy sauté pan. Drain the pasta when it is al dente. Immediately add the pasta to the sauce and toss to combine. Arrange on individual plates, divide the ricotta among them, and drizzle with the oil. Top with plenty of Parmegiano and serve immediately.

Serves 5.

Tuesday, September 25, 2012

Grano Arso

Grano arso means burnt grain. The use of burnt grain for making pasta and bread is thought to have originated a couple of hundred years ago in the cuisine of poverty in southern Italy. Now, while it may not be a necessity for survival, burnt grain is still of interest to the experimental cook.

When I first learned about grano arso pasta, it went directly to the top of my to-do list. It was a must as I love to make pasta and I love toasty flavors.

To make grano arso pasta, simply replace about a quarter of the flour in the recipe with toasted flour. I chose to make grano arso semolina cavatelli. I toasted the semolina until it was very dark—in fact, it was actually smoking when I finally decided it was dark enough to take out of the oven.


Making pasta dough with the toasted semolina was no different than making it with untoasted semolina, though it did absorb a touch more water. But the color, texture, and flavor of the resulting pasta were completely different. The texture of the brown pasta was slightly grainy, and the flavor deep and toasty, reminiscent of a well-charred pizza crust. I served it in my Angry Tomato Sauce, and it was as if a base note was added to the dish.


Fresh Grano Arso Cavatelli
Printable Recipe

16 ounces semolina
8 ounces warm water

Preheat the oven to 350ºF. Spread 4 ounces of the semolina on a baking tray and bake for 25 to 30 minutes, or until toasted and dark brown. Let cool to room temperature.

Combine the toasted semolina, untoasted semolina, and water in a large bowl and mix until a rough dough forms. The dough will seem very dry at this point, but resist the temptation to add more water. Transfer to a work surface and knead for about 10 minutes, or until smooth and elastic. Wrap in plastic wrap and let rest for about half an hour.

Cut the dough into eighths. Keeping the remaining dough covered as you work, roll 1 portion of dough into a ½-inch thick rope. If the dough springs back as you roll it, cover it with plastic wrap and let it relax for a few minutes before continuing. Using a table knife, cut a ¾-inch piece of the rope. With the side of the knife, press down on the cut side of the piece of dough, dragging it toward you at the same time. Unroll the resulting little cup of dough. Make more cavatelli with the remaining dough in the same manner. As you work, arrange the cavatelli in a single layer on lightly floured parchment-lined baking trays. Let dry for a few hours.

Makes about 1 ¼ pounds, enough for 4 to 6 main-course servings. Cook as you would any other pasta, in a large pot of boiling, salted water for 10 to 12 minutes, or until al dente. Regular cavatelli does not contain toasted semolina. Cavatelli can be turned inside out to form orecchiette (watch me make orecchiette in this video).

Thursday, December 15, 2011

Peperoncini


These little devils pack a lot of punch. So I learned when I absentmindedly tossed a bunch into a simmering red sauce. Let's just say the sauce wasn't as angry as it was furious. The next time I carefully counted out the peperoncini—just six of them—to achieve a pleasant warm heat, the perfect level of arrabbiata.


Cavatelli with Angry Tomato Sauce
Printable Recipe

2 tablespoons extra virgin olive oil
4 ounces pancetta, diced
½ small yellow onion, diced
4 cloves garlic, minced
6 dried peperoncini, minced
1 28-ounce can whole peeled tomatoes
Kosher salt
Freshly ground black pepper
1 recipe Fresh Cavatelli
Grated Pecorino Romano or Parmegiano-Reggiano, for serving

Heat a large, heavy saucepan over medium heat until very hot but not smoking. Add the oil and swirl to coat the bottom of the pot. Add the pancetta and fry, tossing frequently, for 4 to 5 minutes, or until golden brown. Using a slotted spoon, remove the pancetta to a plate. Add the onion to the pan and sauté for 3 to 4 minutes, or until soft. Add the garlic and peperoncini and sauté for 30 seconds, or until fragrant. Return the pancetta to the pan, add the tomatoes (along with their liquid), and simmer, stirring occasionally and breaking up the tomatoes with the back of a spoon, for about 45 minutes, or until thickened and saucy. Season to taste with salt and pepper.

Cook the cavatelli in a large pot of boiling, salted water for 10 to 12 minutes, or until al dente. Drain the cavatelli when it is al dente. Add the cavatelli to the sauce and toss to coat. Arrange on individual plates, top with plenty of cheese, and serve immediately.

Serves 4. In Italy, chiles are known as peperoncini. Fiery and flavorful dried peperoncini can be found at well-stocked Italian markets. Quality ones are pliable and easy to mince. If they are unavailable, use several pinches of red chile flakes in their place. You can substitute 1 pound store-bought pasta for the Fresh Cavatelli, if you must. A splash of heavy cream is nice addition to the sauce.

Thursday, December 8, 2011

Pleasures of Pasta Dough

Remember the joy of playing with Silly Putty as a kid? It was squishy, mushy, sticky, stretchy, bouncy impossible-to-put-down fun! Almost equally irresistible were Play-Doh, glarch, and that sticky gum-like substance my teachers used for hanging up posters. I loved all that stuff.

And it turns out I never outgrew it. Just yesterday as I was making a big batch of cavatelli for dinner, it dawned on me that the reason I enjoy making pasta by hand is it appeals to the little girl in me who loved playing with Silly Putty. It's the same sensation, only pasta tastes better. How's that for a deep thought?

Homemade cavatelli, by the way, is the current favorite pasta around here. I adore it because it's so much fun to make and each individual piece of pasta scoops up just the right amount of sauce. My husband prefers it for its resilient, satisfying chew. We can't get enough cavatelli!


Fresh Cavatelli
Printable Recipe

16 ounces semolina
7 ½ ounces warm water

Combine the semolina and water in a large bowl and mix until a rough dough forms. The dough will seem very dry at this point, but resist the temptation to add more water. Transfer to a work surface and knead for about 10 minutes, or until smooth and elastic. Wrap in plastic wrap and let rest for about half an hour.

Cut the dough into eighths. Keeping the remaining dough covered as you work, roll 1 portion of dough into a ½-inch thick rope. If the dough springs back as you roll it, cover it with plastic wrap and let it relax for a few minutes before continuing. Using a table knife, cut a ¾-inch piece of the rope. With the side of the knife, press down on the cut side of the piece of dough, dragging it toward you at the same time. Unroll the resulting little cup of dough. Make more cavatelli with the remaining dough in the same manner. As you work, arrange the cavatelli in a single layer on lightly floured parchment-lined baking trays. Let dry for a few hours.

Makes about 1 ¼ pounds, enough for 4 to 6 main-course servings. Cook as you would any other pasta, in a large pot of boiling, salted water for 10 to 12 minutes, or until al dente. Cavatelli can be turned inside out to form orecchiette (watch me make orecchiette in this video).

Thursday, December 1, 2011

Lasagna Love

My pasta kick continues. There's no doubt that making Lasagna Bolognese from scratch is a labor of love, but all the time and effort results in nothing less than a small miracle.


Trust me when I say people will bow down to you in thanks and admiration.

Want to work culinary wonders of your own? Join me in the kitchen to learn how! Registration for fall Clark College classes just opened. I'll be teaching Money Saving Bulk Aisle Cooking, Chocolate Desserts, Island Dreaming, and Potato Gnocchi, and I hope you can come. Current class listings can always be found in the Cooking Classes, Book Signings & Appearances sidebar on the right.

Lasagna Bolognese
Printable Recipe

2 ounces (½ stick) unsalted butter, diced, plus more for greasing the baking dish
2 ounces all-purpose flour
1 quart milk
½ small yellow onion
1 bay leaf
1 clove
Generous pinch freshly grated nutmeg
Kosher salt
Freshly ground black pepper
1 recipe Fresh Egg Pasta lasagna
6 cups Ragu Bolognese
6 ounces grated Parmegiano-Reggiano

Heat the butter in a small, heavy saucepan over medium heat until it melts, bubbles, and the foam subsides. Add the flour and cook, whisking constantly, for 2 to 3 minutes, or until it begins to smell toasty. Whisk in the milk. Bring to a boil, whisking constantly, add the onion, bay leaf, clove, and nutmeg, and simmer for 20 to 22 minutes, or until thick. Remove from the heat, strain through a fine mesh sieve, and season to taste with salt and pepper. Let cool.

Cook the lasagna in 5 or 6 batches in a large pot of boiling, salted water for 1 to 2 minutes, or until it begins to soften. When the lasagna begins to soften, using a wire skimmer, transfer it from the pot to a large bowl of ice-cold water to stop the cooking process, and then drain it thoroughly. Layer the lasagna between clean kitchen towels to dry.

Preheat the oven to 375˚F. Butter a deep 9×13-inch baking dish. Spread ¾ cup of the ragu in the bottom of the baking dish. Arrange a single layer of lasagna in the dish, spread evenly with ½ cup of the white sauce and then a heaping ¾ cup of the ragu, and sprinkle evenly with ¼ cup of the Parmegiano. Make more layers with the remaining lasagna, white sauce, ragu, and Parmegiano in the same manner, finishing on a layer of Parmegiano. Bake for 35 to 40 minutes, or until the sauce is bubbling around the edges. Cover with foil to keep warm and allow to rest 20 to 25 minutes before serving.

Serves 8. The lasagna should be boiled until it begins to soften but not until it is al dente. Undercooking the pasta in this way ensures that it doesn't become too mushy once it's baked.

Wednesday, October 19, 2011

First Chanterelles of the Season

My husband has developed what can only be described as a sixth sense for mushrooms. Somehow, he knows exactly when and where to look. He said it was time to go hunting. But the weather seemed too warm, and the fog hadn't set in yet. I was certain that the sun was too direct, I was convinced that the ground was too dry. I questioned him. I second-guessed him. I doubted him. Until he led me right to them.


The first chanterelles of the season. This time, I was all too happy to admit he was right.

Despite my husband's keen mushroom hunting intuition, chanterelles are still a rare treat for us. So whenever we find some, we pull out all the stops and make something very special with them. This time it was delicate ravioli.


But before I get to the recipe, here's my interview on the Lonely Gourmet in case you missed it. We chatted about my cookbook and the finer points of searing. So much fun!

Chanterelle Ravioli with Sage Brown Butter
Printable Recipe

2 tablespoons extra virgin olive oil
¾ pound chanterelles, torn into bite-size pieces
1 clove garlic, minced
8 ounces ricotta
1 ½ ounces grated Parmegiano-Reggiano, plus more for serving
1 large egg
Generous pinch freshly grated nutmeg
Kosher salt
Freshly ground black pepper
1 recipe Fresh Egg Pasta dough, cut into sixths
6 ounces (1 ½ sticks) unsalted butter, diced
¼ cup fresh sage leaves

Heat a large, heavy sauté pan over medium-high heat until hot but not smoking. Add the oil and swirl to coat the bottom of the pan. Add the chanterelles and sauté for 6 to 7 minutes, or until tender. Add the garlic and sauté for another 1 to 2 minutes, or until fragrant. Let cool.

Combine the chanterelles, ricotta, Parmegiano, egg, and nutmeg in a food processor and pulse until smooth. Season to taste with salt and pepper.

Sheet and form just 1 or 2 pieces of the pasta dough at a time according to the recipe, sheeting it until the second-to-last narrowest setting of the rollers and using 1 teaspoon of filling per ravioli. As you work, arrange the ravioli in a single layer on lightly floured parchment-lined baking trays.

Heat a small, heavy saucepan over medium heat until very hot but not smoking. Add the butter and cook, stirring constantly, for 5 to 6 minutes, or until browned. Add the sage and a generous pinch of pepper and cook, stirring constantly, for about 1 minute, or until the sage is crisp. Remove the pan from the heat and dip the bottom into an ice water bath for a second or two.

Meanwhile, cook the ravioli in 2 or 3 batches in a large pot of boiling, salted water, stirring occasionally, for 3 to 4 minutes, or until they are al dente. When the ravioli are al dente, using a wire skimmer, transfer them from the pot to a large bowl, drizzle with a bit of the brown butter, and gently toss to coat. Arrange on individual plates, drizzle with the remaining brown butter, top with plenty of Parmegiano, and serve immediately.

Makes approximately 7 dozen 1 ½-inch ravioli, serving 6 as a main course. This was the ravioli plaque used. Speed the cooking time by using two large pots of water for boiling the ravioli. Uncooked ravioli may be frozen in a single layer on a parchment-lined baking tray and transferred to a zip-top bag when frozen solid. Ravioli keep for several weeks frozen. Add them to boiling water while still frozen—there's no need to thaw them, just increase their cooking time by a couple of minutes. Keep scraps of dough leftover from cutting ravioli to put in soup.

Monday, October 10, 2011

Fresh Egg Pasta

It's one thing that should be in every cook's repertoire.

Clockwise from top right: garganelli, corzetti, farfalle, spaghetti, linguini, pappardelle.


But before I share the recipe, I'd like to invite you to tune in to my interview on the Lonely Gourmet at 6PM EST on Friday, October 14. Click to listen live.

Fresh Egg Pasta
Printable Recipe

13 ounces all-purpose flour, plus more for dusting
4 large eggs, at room temperature

Combine the flour and eggs in a large bowl and mix until a rough dough forms. The dough will seem dry at this point, but resist the temptation to add more liquid. Transfer to a work surface and knead for 10 to 15 minutes, or until smooth and elastic. Wrap in plastic wrap and let rest for about half an hour.

Cut the dough into sixths. Flatten 1 portion of dough and pass it through a pasta machine 3 times with the rollers at the widest setting, folding the pasta sheet widthwise into thirds between each pass and feeding the folded pasta into the machine with the folds perpendicular to the rollers. Pass the remaining portions of dough through the pasta machine in the same manner. Close the rollers down 1 notch and pass each pasta sheet through the pasta machine once. Continue passing the pasta sheets through the pasta machine with the rollers at successively narrower settings until the pasta sheets are the desired thickness. As you work, lay the pasta sheets flat in a single layer on a lightly floured surface or clean kitchen towels.

Cut and form the pasta sheets as desired into lasagna, pappardelle, tagliatelle, fettuccini, linguini, spaghetti, garganelli, corzetti, farfalle, ravioli, tortellini, or other shape.

Makes about 1 ¼ pounds, enough for 4 to 6 main-course servings. Making pasta is all about developing a feel for the dough—the more batches you have under your belt, the easier it becomes. Here's what you need to know to get started…Farm fresh eggs with golden yolks make for the best pasta. The amount of flour needed may vary depending on the brand of the flour, the size of the eggs, and the humidity. It's much easier to add flour to a wet dough than it is to add liquid to a dry dough, so hold back a bit of the flour at first and then add more if the dough feels sticky. The result should be a firm dough that isn't sticky at all, and kneading it is quite a workout. If you or the dough need a break, wrap the dough in plastic wrap or cover with an inverted bowl and let rest for up to 5 minutes. When you just can't knead any more, take heart in the fact that rolling the dough through the pasta machine will continue the kneading process. Keep pieces of dough covered until you're ready to roll them out. Using a pasta machine is easier with an extra set of hands, so bribe someone to do the cranking for you with a fabulous homemade pasta dinner. Lightly flour the pasta sheets if they stick or tear as they go through the pasta machine. Catch the pasta sheets as they come out from between the rollers without pulling or tugging. Sheets of pasta may stick to smooth surfaces such as marble or stainless steel, so keep work surfaces dusted with flour or lay the pasta sheets on clean flour sack kitchen towels. Pasta is less likely to stick to wood surfaces. If the pasta sheets get too long to work with comfortably, feel free to cut them into more manageable lengths. For most shapes, pasta is rolled as thin as the second-to-last or third-to-last narrowest setting of the rollers, but thickness is largely a matter of personal preference. Passing all of the pieces of pasta through each setting of the rollers is more efficient than sheeting 1 piece at a time, and it allows all of the sheets to dry at a more even rate. However, hand-formed shapes such as garganelli, farfalle, ravioli, and tortellini must be made with freshly-rolled pasta that hasn't had a chance to dry and harden, so sheet and form just 1 or 2 pieces of dough at a time. For long cut pasta such as fettuccini and spaghetti, allow sheets of pasta to dry a bit until they just start to feel leathery before cutting them. Strands of pasta cut from sheets that are too moist will stick to each other, and pasta sheets that are too dry will shatter when cut. Dust pasta sheets with flour if there's ever any sign of stickage, but try not to use any more flour than necessary (excess flour can be removed with a pastry brush). To cut sheeted pasta into ribbons or strands, dust it with flour and pass it through pasta machine cutters or fold it up widthwise loosely and slice it lengthwise with a knife. For other shapes, use a straight or fluted pastry wheel or other specialized tool. Cut and form shapes as follows:

Lasagna: Cut the sheeted pasta into 9-inch lengths.

Pappardelle: Cut the sheeted pasta into ½ to 1-inch wide strands.

Tagliatelle: Cut the sheeted pasta into ¼ to ½-inch wide strands.

Fettuccini: Cut the sheeted pasta into ¼-inch wide strands.

Linguini: Cut the sheeted pasta into 1/8-inch wide strands.

Spaghetti: Cut the sheeted pasta into strands that are as wide as they are thick.

Garganelli: Cut the sheeted pasta into 1 ½ to 2-inch squares. Roll each pasta square, starting from a corner, around a rolling stick while pressing lightly against a garganelli board, forming ridged tubes with pointed ends. A gnocchi board may be used if a garganelli board is unavailable.

Corzetti: Cut the sheeted pasta into circles using a corzetti cutter and press each circle, first making sure that it is well floured, using a corzetti stamp, forming large coins.

Farfalle: Cut the sheeted pasta into 1×2-inch rectangles and pinch each rectangle at the center, forming butterflies or bows.

Ravioli: Cut the sheeted pasta into pieces slightly longer than a ravioli plaque. Dust a pasta sheet with flour on 1 side only and lay it floured side down on the ravioli plaque. Place a small amount of filling into each depression. Using a fingertip, lightly moisten the pasta around each depression with water. Drape another sheet of pasta over the filled ravioli plaque, eliminating any air pockets as you go. Roll a rolling pin across the ravioli plaque, pressing down hard to cut out the ravioli. To remove the ravioli, invert the plaque onto a lightly floured surface. Make more ravioli with the remaining pasta pieces in the same manner. If a ravioli plaque is unavailable, sandwich evenly spaced bits of filling between sheets of pasta in the same manner, moistening the pasta around the filling with water and eliminating air pockets, and cut ravioli using a cookie cutter, ravioli stamp, or pastry wheel. Size varies.

Tortellini: Cut the sheeted pasta into circles using a cookie cutter or ravioli stamp. Place a small amount of filling in the center of a pasta circle. Using a fingertip, lightly moisten the edges of the circle with water. Fold the wrapper in half over the filling, forming a half circle, and eliminating any air pockets, firmly pinch the edges together to seal. Lightly moisten the corners of the wrapper along the straight side of the half circle with water. Fold the two corners together and firmly pinch to seal. Make more tortellini with the remaining pasta circles in the same manner. Sheeted pasta may be cut into squares using a pastry wheel instead of circles. Formed in the same manner as the wontons pictured here. Size varies.

Maltagliati: Scraps leftover from cutting other pasta shapes, literally "badly cut". Good for soup.

Arrange short cut pasta in a single layer and dust long cut pasta generously with flour and form loose nests on pasta screens, lightly floured parchment-lined baking trays, or towel-lined baking trays. Alternatively, hang long cut pasta on a pasta rack. Pasta may be left at room temperature like this to dry for up to several hours or cooked immediately. Cook in a large pot of boiling, salted water until al dente. Cooking time is usually only 2 to 5 minutes, depending on the thickness of the pasta and how long it has been left to dry.

Saturday, October 1, 2011

The Final Word on Macaroni and Cheese

Macaroni and cheese used to be a tangle of steaming spaghetti with butter and cheese melting into it and a generous grinding of black pepper on top. All gooey and stringy, that's how my mom would make it when I was a kid. She cooked the pasta beyond al dente until it was tender, and she must've used cheddar or mozzarella or possibly Monterey jack but I can't remember for sure. She was never one for sauces.

Then one day, I had dinner at a friend's house and discovered the joy of macaroni bathed in a cheese sauce. It came in the form of Velveeta Shells and Cheese. I know it seems odd to give Kraft credit for one of my formative food experiences, but I still remember it as the moment that I, an impressionable teenager, tasted a creamy cheese sauce for the very first time.

(For the record, I never ate the stuff in the blue box. For some reason, my little brother was crazy for that crap, but not me.)

So now when I close my eyes and imagine the perfect comfort food macaroni and cheese, the dish the kid in me idealizes, I think of a velvety cheese sauce flavored boldly with real cheddar cheese. And I imagine an effortless recipe that is a cinch to quickly throw together on a whim and can be made with ingredients that are always on hand.

It's elusive, this macaroni and cheese I dream of.

For or a long time I thought it didn't exist at all. Most versions that I have had…that I have myself made don't live up. Macaroni and cheese made with roux-based white sauce doesn't quite do it for me because it tastes more like the white sauce than the cheese, no matter how expert the execution and fine the ingredients. It doesn't have the right creaminess either. Besides all that, why should a dish so humble require at least 45 minutes, the use of both the stovetop and the oven, and the dirtying of two pots, a colander, and a baking dish? Boxed macaroni and cheese and deli versions don't even come close, since they employ processed cheese and various neon orange powders in lieu of real cheese.

Researching stovetop recipes proved fruitless, as most called for evaporated milk, which seemed gross, or thickening the sauce with egg, which seemed out of place, or both.

I got to thinking…Why drain the cooked pasta, losing all its precious starch just to use a different starch to thicken the sauce? Why not take advantage of the pasta's own starch for thickening the sauce? And why not cook macaroni and cheese more like it was risotto, adding only as much liquid as the pasta will absorb? I literally ran into the kitchen and started cooking. It was nothing less than a eureka moment!


Thus, Lucy's Ultimate Mac & Cheese was born. I must say, even if it borders on bragging, that I'm really proud of this recipe. The texture and flavor are exactly what I'd been looking for ever since I was a kid. It requires little more time or effort than the packaged stuff, and the only cleanup is one pot and one spoon. It's a stovetop recipe, so you can make it even in the summertime when it's too hot to turn on the oven. Oh, and leftovers, should there be any, reheat nicely in the microwave. I think you'll agree it really is the ultimate.

Lucy's Ultimate Mac & Cheese
Printable Recipe

1 pound elbow macaroni
1 quart milk
4 tablespoons (½ stick) unsalted butter
¼ teaspoon powdered mustard
1/8 teaspoon granulated garlic
Generous pinch cayenne pepper
12 ounces, or more, shredded sharp cheddar
½ teaspoon Worcestershire sauce
1 to 2 teaspoons Tabasco sauce
Kosher salt
Freshly ground black pepper

Combine the macaroni, milk, butter, mustard, granulated garlic, cayenne, and 3 cups of water in a medium, heavy pot. Bring to a boil and simmer, stirring constantly and adding more water as necessary any time the macaroni looks dry, for 7 to 8 minutes, or until the macaroni is just tender. Remove from the heat and stir in the cheddar, Worcestershire, and Tabasco. Season to taste with salt and pepper and serve immediately.

Serves 4 to 6. The trick to this recipe's seductive creaminess is constant stirring from the time the pot is put on the heat and making sure there's enough water in the pot. There will be plenty of liquid in the beginning. When the mixture comes to a boil, the starch from the pasta will make it thicken, creating a creamy sauce. The sauce will reduce and continue to thicken as it simmers and as the pasta absorbs water. Adjust the heat so that it cooks at a lively bubble. Too slow, and the pasta will take forever to cook. Boil it too fast, and it'll be hard to monitor the level of the liquid. Toward the end of the cooking time, there should still be enough sauce in the pot to just cover the macaroni—if not, or if you like it creamier still, add more water a little at a time, keeping in mind that the cheese will thicken the sauce considerably. It's best to incorporate the cheese off the heat. Do not boil the mixture once the cheddar has been added, or it will have a grainy texture. And speaking of cheddar, why stop at 12 ounces when you can add a whole pound? Or mix it up—consider substituting a portion of the cheddar with provolone, mozzarella, and/or Parmegiano for a different flavor and some stringy action. Top with toasted buttered breadcrumbs or some such crunchy thing if you must, but I prefer to appreciate the creaminess unspoiled.

Friday, May 7, 2010

A Gift for Mother's Day

I had planned to get my mom an aebleskiver pan for Mother’s Day. I’d been thinking about it for a few months, ever since she mentioned she’d like to have one. I take note when the people I love mention what’s on their wish list—I pride myself in being a good gift giver. An aebleskiver pan was the perfect gift idea for Mom, my little brother agreed. I knew she would never get one for herself.

But Mom went and got herself an aebleskiver pan. Foiled by my own mother. I was so set on getting her this aebleskiver pan that I had no back-up plan.

But yesterday Mom asked for a mac and cheese recipe…So, Mom, here's your Mother’s Day gift.


I developed this recipe just for you, and I really hope you like it. I wish I could be there in person to make this for you on Mother’s Day. I’d serve it to you with a big green salad on the side because I know that’s how you’d like it. And I’d even do the dishes.

Happy Mother’s Day Mom, I love you!

And happy Mother’s Day to all you moms out there!

Macaroni & Cheese with Tomatoes & Herbes de Provence
Printable Recipe

6 tablespoons (¾ stick) unsalted butter, diced, plus more for greasing the baking dishes
¾ cup panko breadcrumbs
2 tablespoons extra virgin olive oil
1 teaspoon Herbes de Provence
1 ounce grated Parmegiano-Reggiano
¼ cup plus 2 tablespoons all-purpose flour
1 quart milk
2 cloves garlic, grated
1/8 teaspoon piment d'Espelette
12 ounces shredded medium cheddar
4 ounces shredded provolone
Kosher salt
Freshly ground black pepper
1 pound short tubular pasta, such as macaroni, penne, or rigatoni
12 ounces grape or cherry tomatoes, halved

Preheat the oven to 350˚F. Butter 6 individual baking dishes. Toss together the breadcrumbs and oil in a medium bowl, making sure that the breadcrumbs are evenly coated. Stir in the Herbes de Provence and Parmegiano.

Heat the butter in a large, heavy pot over medium heat until it melts, bubbles, and the foam subsides. Add the flour and cook, whisking constantly, for 2 to 3 minutes, or until it begins to smell toasty. Whisk in the milk, garlic, and piment d'Espelette. Bring to a boil, whisking constantly, and simmer for 3 to 4 minutes, or until thick. Remove from the heat, stir in the cheddar and provolone, and season to taste with salt and pepper.

Meanwhile, cook the pasta in a large pot of boiling, salted water according to the package directions. Drain the pasta when it is al dente. Immediately add the pasta to the cheese sauce and toss to combine. Divide among the baking dishes. Divide the tomatoes among the baking dishes, arranging them evenly over the macaroni and cheese. Sprinkle evenly with the breadcrumb mixture. Arrange the baking dishes on a baking tray and bake for 20 to 25 minutes, or until the sauce is bubbling around the edges. If the breadcrumb topping is still pale, broil for 2 to 3 minutes, or until golden brown. Serve immediately.

Serves 6. The piment d'Espelette, a Basque chile powder, may be replaced with a pinch of cayenne pepper. Don’t bake the mac and cheese too long—overcooked cheese sauce becomes grainy. May be prepared a day or two in advance and kept covered with aluminum foil in the refrigerator. Bring to room temperature and bake just before serving.

Thursday, May 21, 2009

Orzo

If I had to pick a favorite pasta shape, I’d probably go with orzo. My mom used to add it to chicken soup when I was a kid. Now I like to eat it plain, with nothing but a dab of butter and a grinding of pepper, or I’ll toss in some cooked broccoli and grated Parmegiano and call it dinner. It’s the texture of orzo that I really like. And the fact that you don’t have to twirl it around a fork, you can just shovel it in. It’s high on my list of comfort foods.

I think that orzo is the most misunderstood pasta shape of all. It troubles me when people are confused about it, when they’re convinced it’s rice. I feel I must come to its defense against this common mix-up—orzo isn’t rice, it’s pasta. Pasta, really. I just want people to understand.

But—and here’s where it gets complicated—even though orzo is pasta, it can be cooked like rice. It’s especially good cooked like rice pilaf. That’s exactly what I recently did, since it’s right in the middle of spring, and I’m having to dream up lots of different and delicious ways to prepare all the beautiful asparagus I keep bringing home from the farmers market.


Orzo Pilaf with Asparagus & Prosciutto
Printable Recipe

1 quart chicken broth
4 tablespoons (½ stick) unsalted butter
1 pound orzo
4 to 6 cloves garlic, minced
3 ounces thinly sliced prosciutto, julienned
1 pound asparagus, trimmed of woody ends, thinly sliced on a bias, and blanched
Kosher salt
Freshly ground black pepper
Grated Parmegiano-Reggiano, for serving

Bring the broth to a simmer in a small saucepan. Meanwhile, heat a large, heavy pot over medium-high heat until very hot but not smoking. Add the butter and swirl to coat the bottom of the pot. Add the orzo and sauté for 4 to 5 minutes, or until golden brown. Add the garlic and sauté for another 30 seconds, or until fragrant. Add the hot broth and simmer, stirring frequently, for 10 to 12 minutes, or until the orzo is al dente. Stir in the prosciutto and asparagus and season to taste with salt and pepper. Arrange on individual plates, top with plenty of Parmegiano, and serve immediately.

Serves 4 to 6 as a main course. Toasting the orzo gives it complex nutty flavor. Be aware that the broth will bubble up furiously when you add it to the orzo.

Sunday, April 12, 2009

Black Truffles and a Birthday

Oregon black truffles are still in season, and they had them at the farmers market yesterday. Yes, it’s true—truffles really do grow in Oregon. Considering it was the hubby’s birthday, we decided to splurge just a little bit.


Now that’s what I call black gold. We shaved our truffle over Fresh Egg Pasta tossed with some beautiful farm-fresh butter (another one of our market finds), chives from our garden, fleur de sel, and Parmegiano-Reggiano.


It was unexpected, simple, and just lovely. Happy birthday, husband of mine!

Fettuccini with Black Truffles
Printable Recipe

¾ pound Fresh Egg Pasta fettuccini
Kosher salt
3 tablespoons unsalted butter
¼ cup minced fresh chives
Fleur de sel
Freshly ground black pepper
Grated Parmegiano-Reggiano, for serving
As many black truffles as you can afford

Cook the fettuccini in a large pot of boiling, salted water for 2 to 3 minutes, or until al dente. Drain the fettuccini when it is al dente. Toss together the fettuccini, butter, and chives in a large bowl and season to taste with fleur de sel and pepper. Arrange on individual plates, top with plenty of Parmegiano, and using a truffle shaver, shave paper-thin slices of truffle over the dish. Serve immediately.

Serves 2 as a main course. This simple dish is all about the truffles. If you don’t have fresh black truffles, a drizzle of truffle oil would also be good.

Wednesday, March 25, 2009

A Favorite with a Twist

I just had a stroke of inspiration to add pureed roasted red bell peppers to my favorite quickie pasta dish. I’ll always love the original, but this one’s a keeper too!


Penne with Tomato-Pepper Sauce & Fresh Mozzarella
Printable Recipe

1/3 cup heavy cream
3 roasted red bell peppers
2 tablespoons extra virgin olive oil
4 to 6 cloves garlic, minced
Generous pinch red chile flakes, optional
26 ounces strained tomatoes, preferably Pomì brand
3 to 4 large sprigs basil, plus chiffonaded leaves for serving
1 pound penne rigate
Kosher salt
Freshly ground black pepper
8 ounces fresh mozzarella, drained and diced
Grated Parmegiano-Reggiano, for serving

Combine the cream and bell peppers in a blender and blend until smooth. Heat a large, heavy sauté pan over medium-high heat until very hot but not smoking. Add the oil and swirl to coat the bottom of the pan. Add the garlic and chile flakes, if desired, and sauté for 30 seconds, or until fragrant. Add the bell pepper mixture, tomatoes, and basil sprigs. Bring to a boil and simmer, stirring occasionally, for 18 to 20 minutes, or until thickened and saucy.

Meanwhile, cook the penne in a large pot of boiling, salted water according to the package directions. Season the sauce to taste with salt and pepper and discard the basil sprigs. Drain the penne when it is al dente. Immediately add the penne to the sauce and toss to combine. Remove from the heat, let cool for a few minutes, and stir in the mozzarella. Arrange on individual plates, top with plenty of Parmegiano and basil, and serve immediately.

Makes 4 to 6 servings. The red bell peppers make this the reddest red sauce you’ve ever seen. It's a variation of another even simpler pasta dish I make; to try it, just omit the bell peppers but still add the cream. Fresh mozzarella balls come in a variety of sizes, and if you want a shortcut, look for pearlini, which are so small they don’t even need to be diced. Be sure to let the pasta cool a bit before adding the mozzarella, or it will melt into a gooey mess. It also helps if the mozzarella is cold when it goes in. This is a satisfying vegetarian dish, but my husband, who is decidedly not vegetarian, kept insisting that we should've added Italian sausage. I must admit that sounds good too.

Friday, February 20, 2009

Go-To

Do you have a go-to dinner? A dish you make more often than any other? One that you can eat over and over again and never gets old? Here’s my current go-to.


Looks good, even if I do say so myself. I’m actually gonna go way out on a limb here and say that it’s the perfect meal—it’s budget friendly, it’s a breeze to throw together, it's got all the important stuff like starch, veggie, and protein right in there, and it’s so fresh and vibrant you feel good eating it. And the leftovers are great for lunch the next day. And, it just tastes so good. What, did you say you don’t have a go-to dinner of your own? Well you’re welcome to try mine.

Pasta with Arugula, Roasted Peppers & Italian Sausage
Printable Recipe

4 links hot Italian sausage
1 pound fusilli, rotini, or penne
Kosher salt
½ cup extra virgin olive oil
3 cloves garlic, grated
2 roasted red bell peppers, julienned
2 roasted yellow bell peppers, julienned
7 ounces baby arugula
Grated Parmegiano-Reggiano, for serving

Heat the grill to medium-low. Add the sausages and cook, covered, without disturbing for 8 to 9 minutes, or until they release from the grate and are crusty and brown. Using tongs, turn the sausages and continue to cook, covered, over medium-low heat another 6 to 7 minutes, or until cooked through. Remove the sausages to a plate, tent with foil to keep warm, and let rest for about 5 minutes.

Meanwhile, cook the pasta in a large pot of boiling, salted water according to the package directions. Whisk together the oil and garlic in a very large bowl. Add the red bell peppers, yellow bell peppers, and arugula and toss to coat. Season to taste with salt. Cut the sausage links in half lengthwise and slice into bite-size pieces. Drain the pasta when it is al dente. Immediately add the pasta and sausage to the arugula mixture and toss to combine. Arrange on individual plates, top with plenty of Parmegiano, and serve immediately.

Serves 6. The arugula will wilt ever so slightly from the heat of the cooked pasta and sausage. Leftovers are delicious served at room temperature or reheated.

Saturday, June 28, 2008

Lazy

I didn’t feel like going to the market today. When I don’t feel like going to the market, I make Pasta Puttanesca for dinner. I always have all of the ingredients around, and it’s quick, easy, and tasty.

Pasta Puttanesca
Printable Recipe

1 tablespoon extra virgin olive oil
3 cloves garlic, minced
3 anchovy fillets, minced
Several pinches red chile flakes
1 28-ounce can whole peeled tomatoes
2/3 cup pitted Kalamata olives, quartered
2 tablespoons capers
1 pound spaghetti or bucatini
Kosher salt
2 tablespoons minced Italian parsley
Freshly ground black pepper
Grated Parmegiano-Reggiano, for serving

Heat a large, heavy sauté pan over medium heat until hot but not smoking. Add the oil and swirl to coat the bottom of the pan. Add the garlic, anchovies, and chile flakes, and sauté for about a minute, or until fragrant. Add the tomatoes (along with their liquid), olives, and capers, and simmer, stirring occasionally and breaking up the tomatoes with the back of a spoon, for about 15 minutes, or until thickened and saucy.

Meanwhile, cook the pasta in a large pot of boiling, salted water according to the package directions. Drain the pasta when it is al dente. Add the pasta to the sauce and toss to coat. Stir in the parsley and season to taste with salt and pepper. Arrange on individual plates, top with plenty of Parmegiano, and serve immediately.

Makes 4 servings. I like to use San Marzano tomatoes, which are wonderfully sweet, for this dish. They cost a bit more, but they’re so worth it. They’re available at most gourmet markets.

Monday, May 12, 2008

Simplicious

I made it up. I use it to describe a dish that’s both simple and delicious, like this one.

Orecchiette with Sausage & Broccoli
Printable Recipe

1 recipe Fresh Orecchiette
Kosher salt
¼ cup plus 2 tablespoons extra virgin olive oil
½ pound bulk Italian sausage, crumbled
4 to 6 cloves garlic, minced
Several pinches red chile flakes
¾ pound broccoli florets
¼ cup water
Freshly ground black pepper
Grated Parmegiano-Reggiano, for serving

Cook the orecchiette in a large pot of boiling, salted water for 10 to 12 minutes, or until al dente.

Meanwhile, heat a large, heavy sauté pan over medium-high heat until very hot but not smoking. Add 2 tablespoons of the oil and swirl to coat the bottom of the pan. Add the sausage and cook for 4 to 5 minutes, tossing about 2 times, until nearly cooked through and crusty and brown in spots.*


Reduce the heat to medium-low, add the garlic and chile flakes, and stir for a minute or so until fragrant. Add the broccoli and water, cover, and cook for another 4 to 5 minutes, or until the broccoli is just tender. Season to taste with salt and pepper. Drain the orecchiette when it is al dente. Add the orecchiette and the remaining ¼ cup oil to the sauté pan and toss to coat. Arrange on individual plates, top with plenty of Parmegiano, and serve immediately.

Makes enough for 4 very hungry people. You can substitute 1 pound store-bought pasta for the Fresh Orecchiette, if you must.

*Searing the sausage in this manner adds tons of flavor to the finished dish. For everything you ever wanted to know about searing, plus dozens of fabulous searing recipes, look for my book Seared to Perfection in stores in the fall of 2010.

Orecchiette

I prefer cookware to diamonds, my husband knows. Now I want a pasta extruder, but not any pasta extruder. I want the one that has the bronze dies, like Italian cooks swear by. You see, bronze dies yield pasta with a rough texture, and the sauce sticks better. But the pasta extruder I want is only available in Europe. Figures. And it costs about as much as a diamond, too.

So, I have to make do without this shiny new piece of kitchen machinery for now. I have no choice but to make orecchiette. It’s formed by hand, and the only special equipment you need is a table knife.

Fresh Orecchiette
Printable Recipe

2 cups semolina
2 cups all-purpose flour
¼ teaspoon kosher salt
1 ¼ cups plus 2 tablespoons warm water

Combine the semolina, flour, and salt in a large bowl. Add the water and mix until a rough dough forms.


The dough will seem very dry at this point, but resist the temptation to add more water. Transfer to a work surface and knead for about 10 minutes, or until smooth and elastic.


Wrap in plastic wrap and let rest for about half an hour.

Cut the dough into eighths. Keeping the remaining dough covered as you work, roll 1 portion of dough into a ½-inch thick rope.


If the dough springs back as you roll it, cover it with plastic wrap and let it relax for a few minutes before continuing. Using a table knife, cut a ¾-inch piece of the rope. With the side of the knife, press down on the cut side of the piece of dough, dragging it toward you at the same time. Turn the resulting little cup of dough rough side out.


Make more orecchiette with the remaining dough in the same manner. As you work, arrange the orecchiette in a single layer on lightly floured parchment-lined baking trays. Let dry for a few hours.

Makes about 1 ¾ pounds, enough for 4 or 6 main-course servings. Cook as you would any other pasta, in a large pot of boiling, salted water for 10 to 12 minutes, or until al dente. Orecchiette are essentially inside-out cavatelli.

Blog Widget by LinkWithin